- Questions?
- Contact


Bracketing Exposure
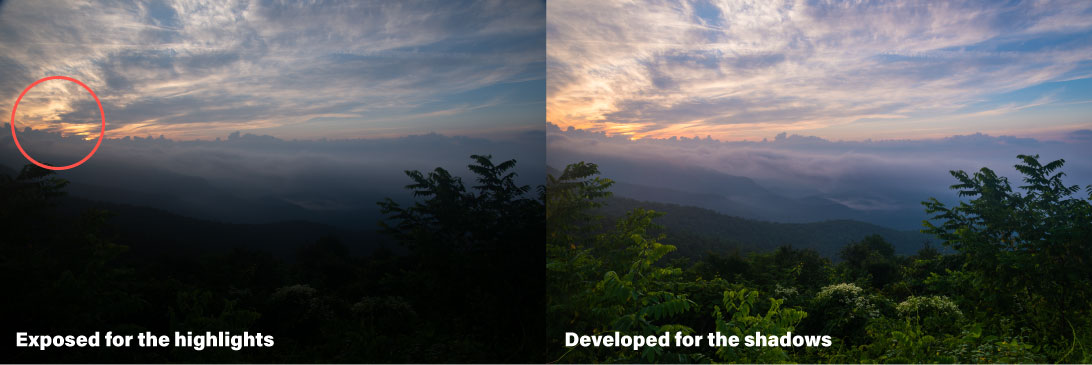
Expose for the highlights and develop for the shadows
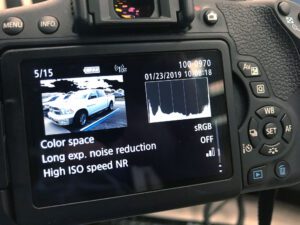
This means when you are getting the image ready, make sure there is detail in the highlights of the image. As long as you have details there, you can pull more detail out of the shadows to compensate for the dark image. So, how do you know when your highlights are being clipped? The easiest method is to click the info button when you are previewing the image in the back of the camera. On the Canon T6i, there is a view that shows the histogram and a preview of where the highlights are clipped. Looking at the image to the right, you can see they black areas in the sky surrounding the truck, these are areas where there is no detail in the highlights.
Another way to ensure you are capturing the best image is to use a technique called bracketing. This means you take several exposures of the same image changing the exposure by several different stops. This provides you a choice when editing the image to find the correct exposure that works for your needs. Also, if you use a tripod, this allows you to create what is called an HDR image.
Bracketing a shot
To bracket a shot you need to start with your base exposure. This is called the N (or Normal) exposure. You will then take two shots that are overexposed. The first by one stop (N+1) and the second by two stops (N+2). Now, you take two more exposures, but this time you underexpose by one stop (N-1) and then by two stops (N-2).

Now, this is a lot of work to do, and some cameras have an automatic bracketing function built into them. I don’t recommend this method all of the time, but when you are in a tricky lighting situation, it might help you get the right exposure.