
A digital single-lens reflex camera or SLR is a common tool in the designer’s tool bag. Unlike a point and shoot camera or a smart phone, the dSLR provides some additional creative controls allowing the photographer the ability to control how the final image will appear. In the photo above, the photographer was able to use depth of field to selectively focus on the lens. This technique helps direct the viewers’ attention to what is most important to the photographer.
What is a Single-Lens Reflex
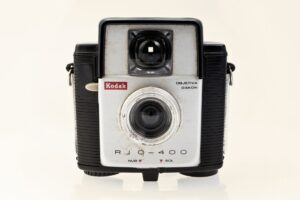
What makes an SLR camera unique is the ability to look through the lens and preview how the image will appear when it is shot. Using a series of mirrors behind the lens and in the pentaprism (viewfinder), the viewer is able to look directly through the lens and preview how the image will appear. Before the advent of digital cameras, this was a unique feature as most of the point and shoot cameras had a small viewfinder that above or next to the lens (see the Kodak Brownie image). Looking through this viewfinder would provide an approximation of the image, but you were not able to see how it appeared through the lens. Thankfully, with the advent of digital cameras, the photographer is able to see through the lens before the image is taken with any camera.
Cross-Section of a dSLR
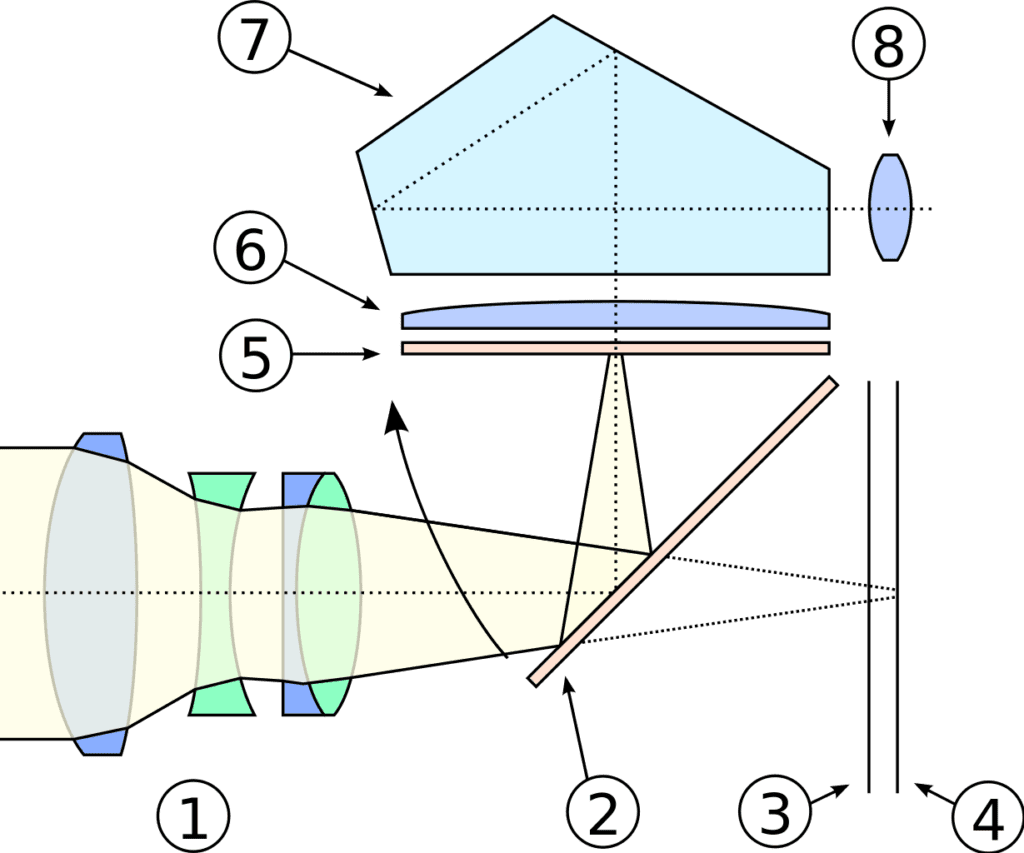
- Lens Assembly
- Mirror (in down position)
- Focal Plane Shutter
- Sensor
- Focusing Screen
- Condensing Lens
- Pentaprism
- Eyepiece
Advantages of a dSLR
So, if all cameras can see through the lens, why would you want to invest in a dSLR camera? The simple answer is creative controls. When you purchase a dSLR you are purchasing a system that allows you flexibility to choose different lenses to help accommodate the type of shooting you will be doing. For those who are shooting buildings, there are specific lenses that allow the photographer to correct perspective in camera. For portrait photographers, there are lenses that allow for low-light shooting and provide the beautiful depth of field effects that help focus in on the subject. For sports photographers there are lenses that allow the photographer to get up close with the action and cameras that provide high frame rates. As you can see from these examples, the dSLR provides a lot of flexibility. But, it also provides a path to future cameras. If you purchase good lenses, they will outlast your current camera, so you only need to upgrade the camera body.
Disadvantages of a dSLR
Yes, there are some disadvantages. First off, they are bigger and heavier than your point and shoot cameras. One of my favorite sayings is “the best camera is the one that is with you.” For some photographers, it’s a chore to carry around the weight, so they will miss out on some shots when they wish they had it. Also, there are issues with dust that arise when you are changing lenses on the camera. This is easily fixed through a cleaning process, but it does require you to occasionally maintain the camera. Finally, they are costly and addicting.
Mirrorless vs. dSLR
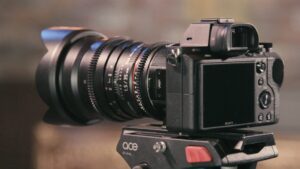
If you’re in the market to purchase your first camera, this is a decision you will be faced with–whether to buy a mirrorless camera or not. Mirrorless cameras are very similar to dSLR cameras, but they remove the mirror and instead use the sensor to live view what is going through the lenses. By removing the mirrors, the camera can be smaller and lighter. The creative controls are the same on both cameras, so really this decision comes down to what feels better in your hands and whether you prefer an analog viewfinder, or a digital viewfinder. If you prefer to use the screen on the back of the camera, rather than the viewfinder, you may find the mirrorless is better suited for you.
How to hold a digital SLR Camera
RAW files vs. JPG files
When choosing what type of images to shoot, you’ll be confronted with a choice of RAW or JPG files. To get the maximum amount of quality from the camera you should always choose to shoot RAW, however, this may slow your post-processing workflow and will definitely take up more space on the hard drive. But, there are also some advantages to shooting in JPG format. Below is a breakdown of pros and cons for each file format.
Using RAW Files
| Advantages | Disadvantages |
|---|---|
| Provides the maximum amount of detail the camera can provideAllows you the ability to recover lost details in the highlights and shadowsEasily adjust the white balance of images after shot | Files must be processed in a program after shooting such as Adobe Lightroom or Adobe PhotoshopFile sizes are significantly larger when compared to JPG filesMost camera companies use their own proprietary file format to encode RAW files which may be an issue in the future. |
Using JPG Files
| Advantages | Disadvantages |
|---|---|
| Small file sizesStandard format works with all programsPost-processing is not necessary to have a good image | Lack of options when editing (there is not the extra exposure information to recover highlights and shadows like you can with a RAW file). |
The Best of Both Worlds?
Some cameras provide the option to shoot in RAW+JPG. This allows you to quickly take the JPG photo and send it to the client, while providing a RAW file for later processing. Of course, shooting two files for every exposure does increase the need for additional storage, so it really depends on the situation you are shooting.
Framing the Shot
Along with learning the controls of the camera, it’s important to understand how to frame and compose an image. Below are some examples of how to frame an image in the camera.
The Rule of Thirds
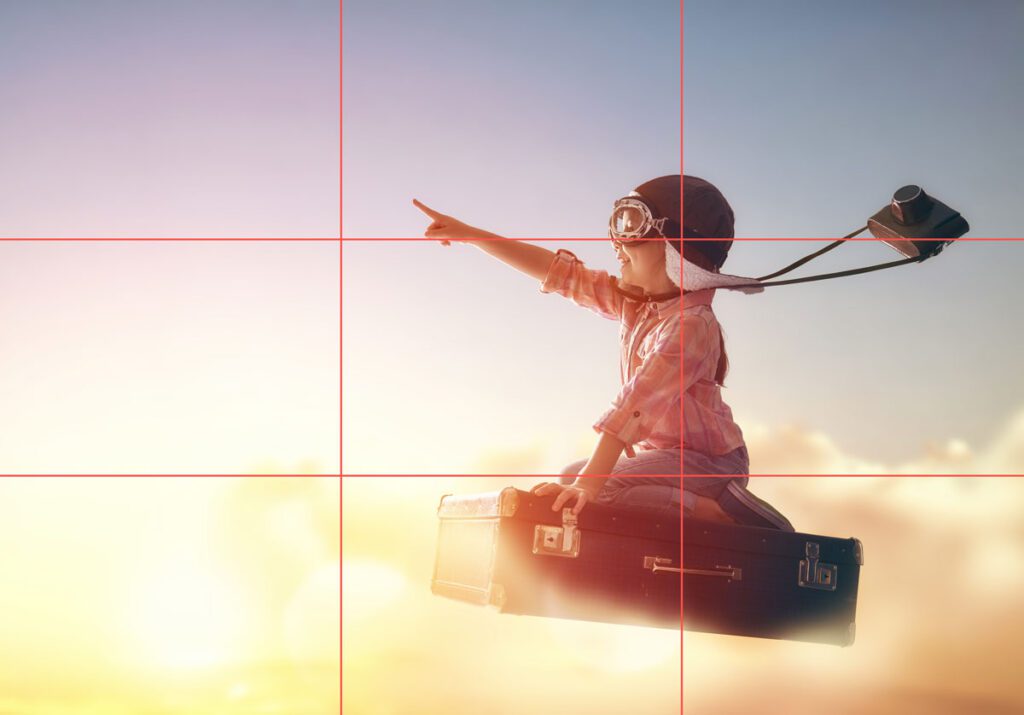
The Rule of Thirds is an easy rule to understand. Divide the viewfinder of the camera into 3 rows and columns, and place your subject or point of focus where the lines intersect. Many cameras have a grid view built into the viewfinder to help you frame your shots better.
Frame the Shot
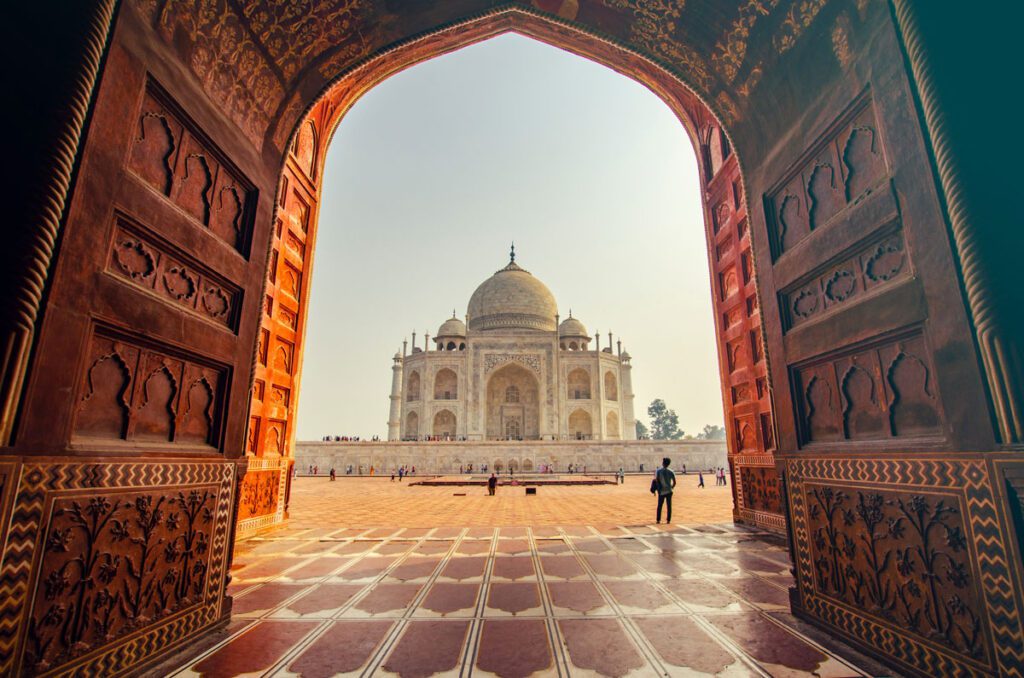
Use elements within the environment to help you frame the shot. In the image above, the doorway frames the Taj Mahal for the viewer, providing a sense of scale and allowing you to feel as though you are in the image.
Embrace Triangles
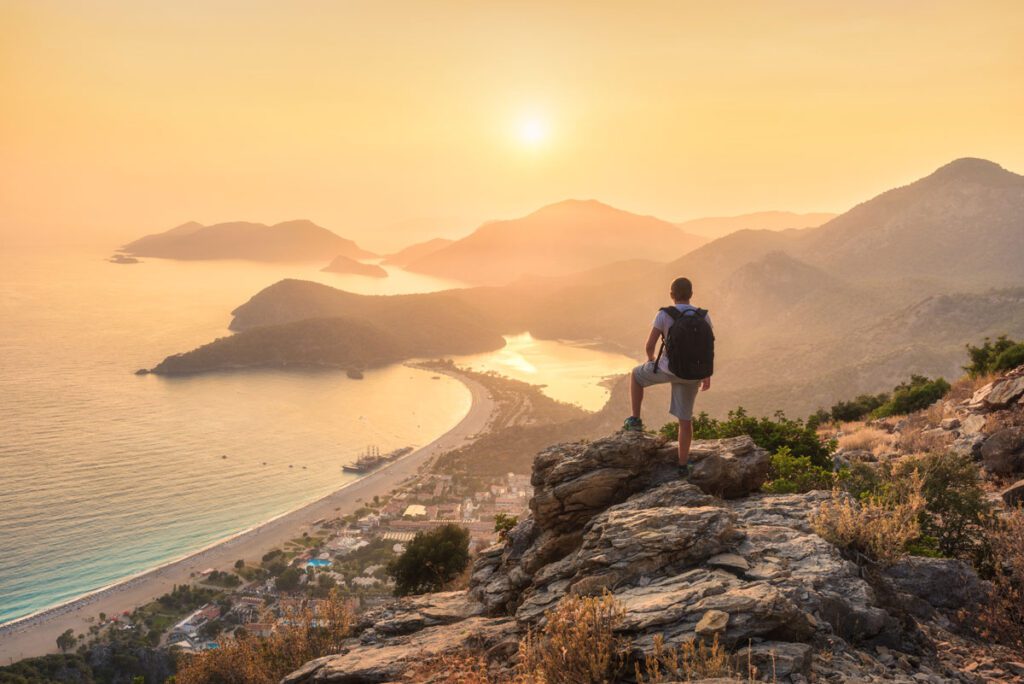
Use triangles and strong angular elements to add visual interest to your image. In the image above, the mountains make obvious triangles, but you can also so the coastline makes a strong triangle, as do the rocks the model is standing on.
Use Leading Lines
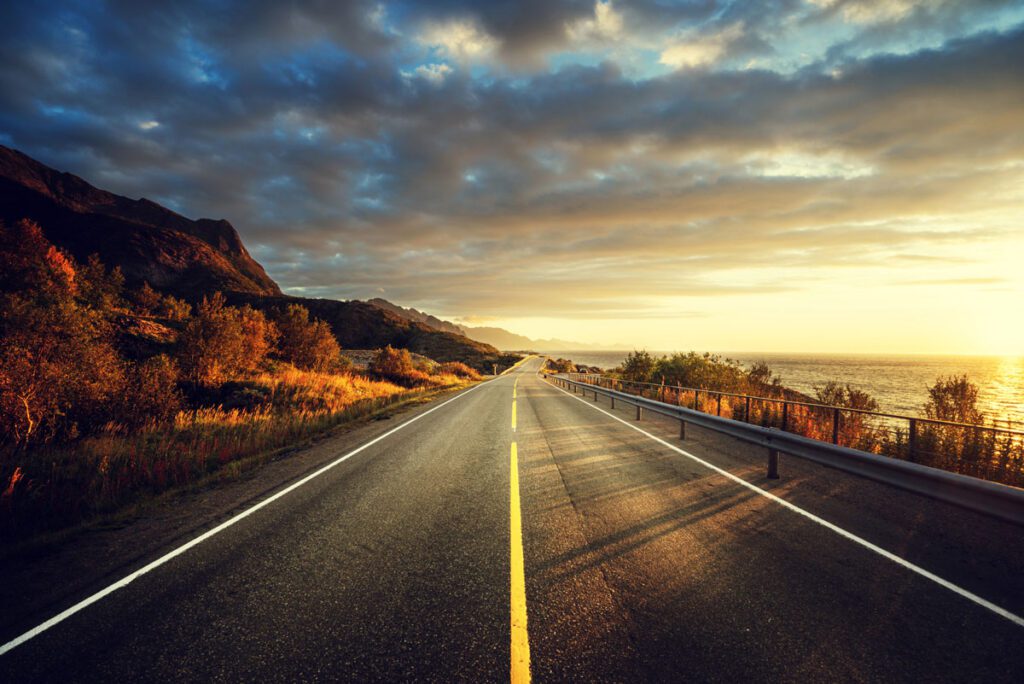
Use lines in your shot to help focus the viewer’s attention on your subject. In the image above, the lines of the road draw our attention up to the middle of the scene to question where is the road headed.
Use Contrasting Elements
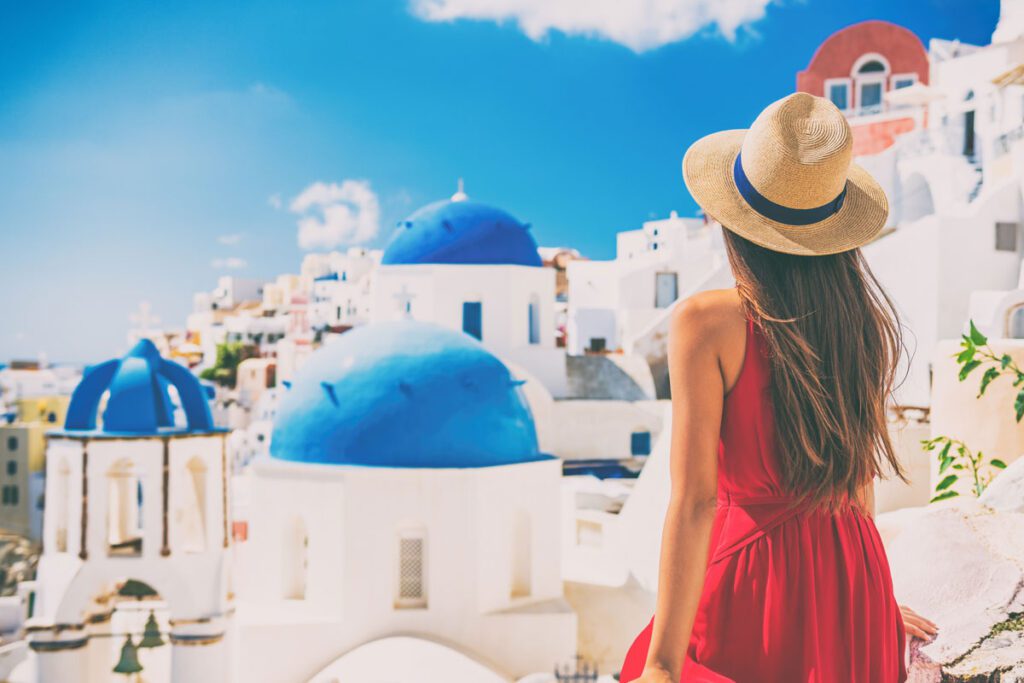
Use contrasting elements, such as size or color to add visual interest to the image. In the instance above, the model’s red dress is in stark contrast to the blue and white buildings in the scene drawing our attention immediately to the model.
Shooting in Automatic Mode
When you’re first learning to shoot, it’s important to go out and use the camera. There is no substitute for holding the camera and pressing the buttons. And don’t worry about messing up the camera, beyond dropping it there isn’t much you can do to mess it up. So, let’s get the camera set to shoot in full Automatic Mode—which puts the camera in control of the exposure decisions.
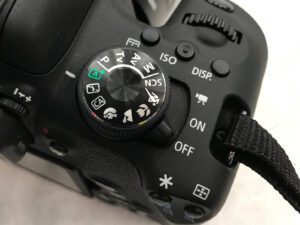
Step 1: Move the dial to Full Automatic
For most models of cameras, this mode is designated by an A letter. On the Canon T6i, this is also designated by the green color.
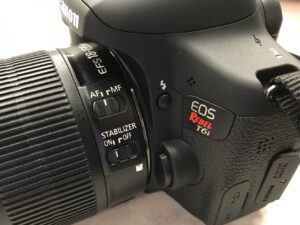
Step 2: Set the lens to Autofocus
Using the Canon 18-135mm lens, these controls are found directly on the lens. For other camera/lens combinations, the auto focus controls may be found on the lens or the camera body, or both depending on the model.
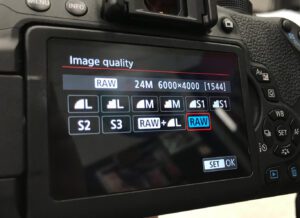
Step 3: Set the image quality to RAW
On a Canon Rebel T6i, click the menu button and move to Image Quality. For different cameras, check the camera documentation to determine how to set this mode.
Time to Capture Images
It’s time to apply some of the knowledge you’ve learned and take some images.
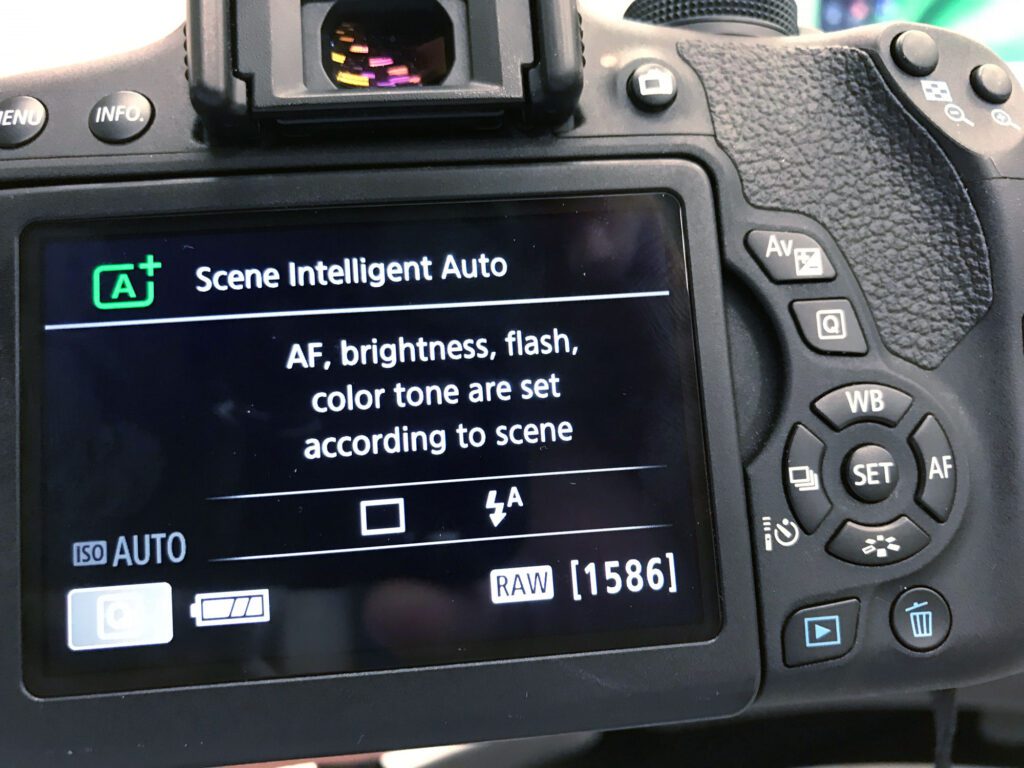
Set the camera to full automatic mode, make sure the autofocus is on, and double check the capture file type is RAW. Spend some time working with autofocus trying to get a feel for how it works. When you press the shutter button halfway, you will notice the autofocus attempting to focus the scene. Once you feel comfortable with the camera, take a walk around and put the camera’s viewfinder to your eye and take a few shots and practice composing the shot in the viewfinder.
Make sure to use the Rule of Thirds while you are capturing images.
Try some of these shots:
- Have someone walk by the camera (slowly) to see if you can focus on them.
- Try zooming in and taking an image of an object close up.
Start with taking at least 12 images to get a feel from the camera. When you’re done, we’ll import the images into Adobe Lightroom.
Importing shots in Lightroom
Video Overview
This video will demonstrate how to import photos into Adobe Lightroom as a DNG file.
Your Turn
Using Adobe Lightroom, import the shots as a DNG file to your computer. Familiarize yourself with the interface and practice moving between images and zooming around them. You can also print a contact sheet of your images to review with your client.
Dreams of Travel by Konstantin Yuganov available on Adobe Stock
Taj Mahal by Sylwia Bartyzel available on Unsplash
Man on top of rock by Den Belitsky available on Adobe Stock
Road by the sea by Iakov Kalinin available on Adobe Stock
Tourist traveling in Santorini, Oia island by Maridav available on Adobe Stock
SLR Cross Section image from: “SLR Cross Section” by Wikimedia Commons is licensed under CC BY SA 3.0
