
In this lesson, you will learn about the key features of the Premiere Pro interface and how to work within a multi-panel program. You will also learn how to structure files on your hard drive and how to create a new Premiere Pro project.
Learning Targets
- The learner will distinguish the components that make up the interface in Premiere Pro.
- The learner will employ professional file structure and organization techniques.
Understanding Premiere Pro Interface
Adobe Premiere Pro is a non-linear editing (NLE) system for building broadcast-quality videos. It is a panel-based system where all of the essential tools and options are provided on the different panels. All panels can be found under the Window command on the menu bar. The preferred method for working is to utilize the pre-defined Workspaces as shown below, where the panel locations have already been determined.
Essential Panels
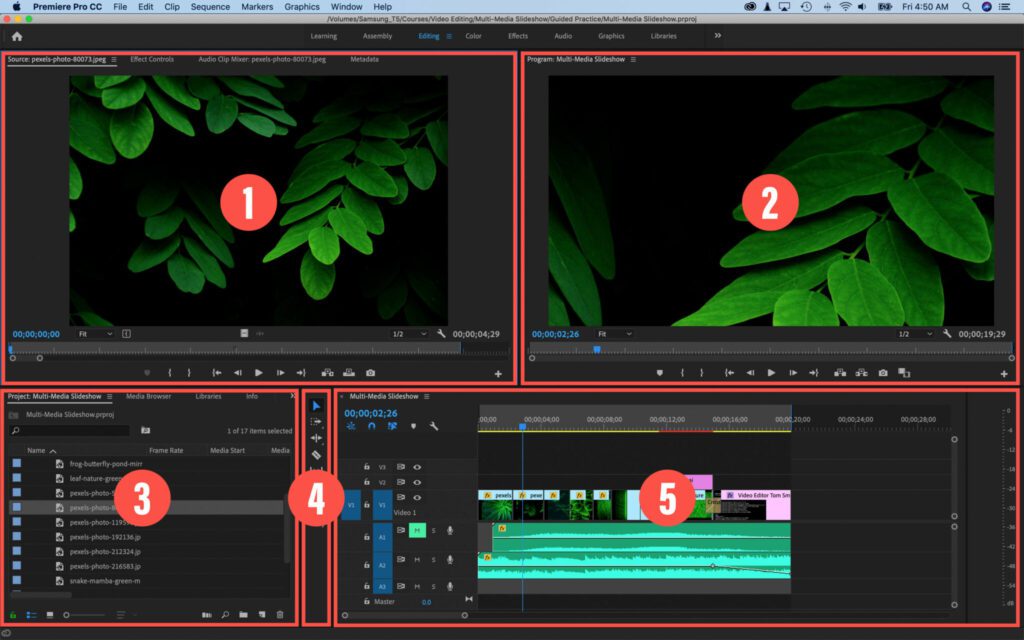
- Source Panel
This is where you can preview your assets before adding them to the timeline. - Program Panel
This is where you can preview your project as you make edits. - Project Panel
This is where you import and organize all of your project assets. - Tools Panel
These are the essential tools for editing clips on the timeline. - Timeline Panel
This is where you arrange and edit your assets for the project.
Pre-Defined Workspaces
As is standard with all Adobe products, the interface is built with different workspaces. These workspaces change the locations of the panels and tools based around the tasks you are looking to accomplish. Each of these workspaces is fully customizable and you have the option to create and save your own custom workspaces based around your workflow. To access these options, go to window > workspaces on the menu bar.
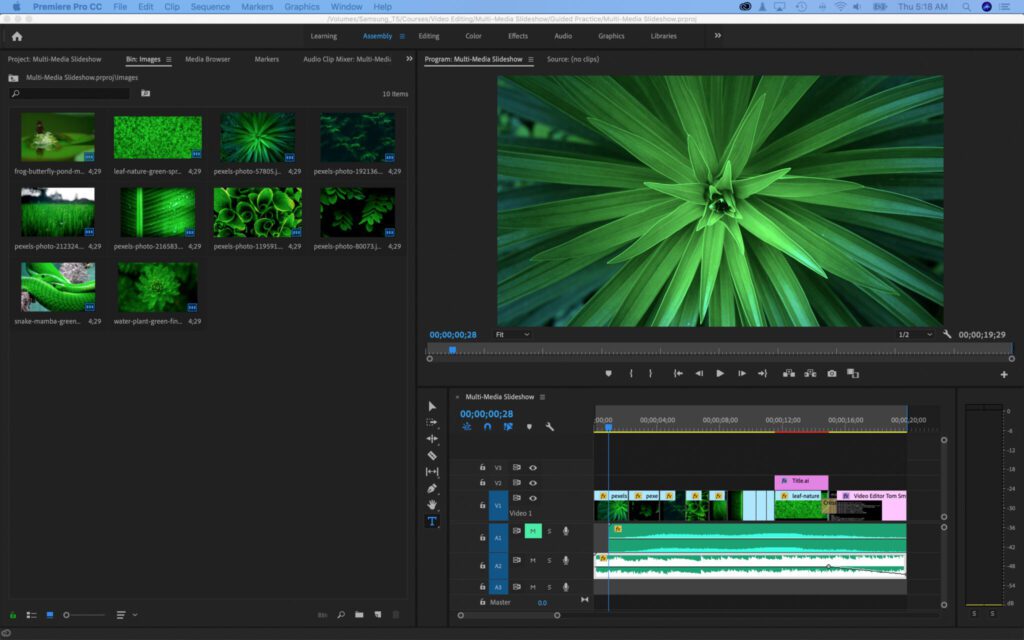
Assembly Workspace
This workspace is meant to help you assemble your project quickly. It provides a large view of the Project Panel and combines the Program and Source Panels in one location.
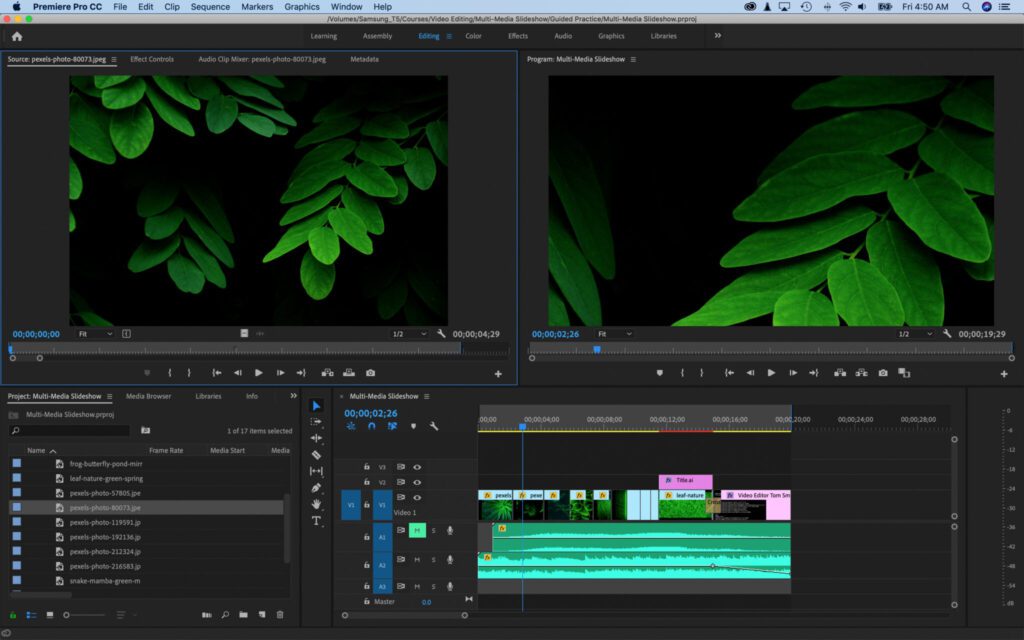
Editing Workspace
This is the default workspace for working. It provides access to the Project Panel, Source Panel, Program Panel, and Timeline Panel.
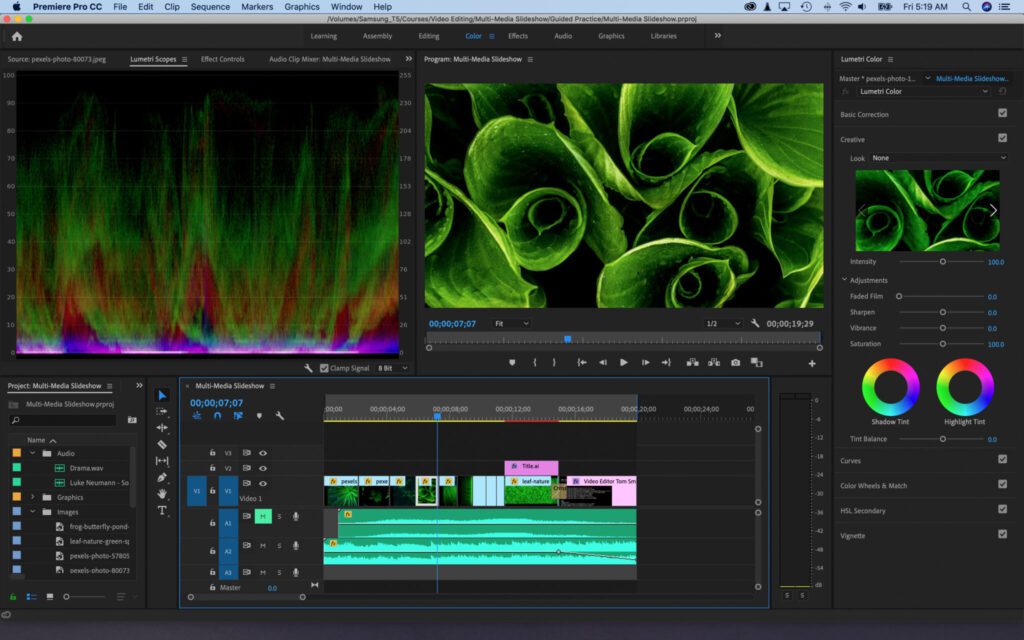
Color Workspace
This workspace is similar to the Editing Workspace, but it provides easy access to the Lumetri Color panel and adds the Lumetri Scopes under the source
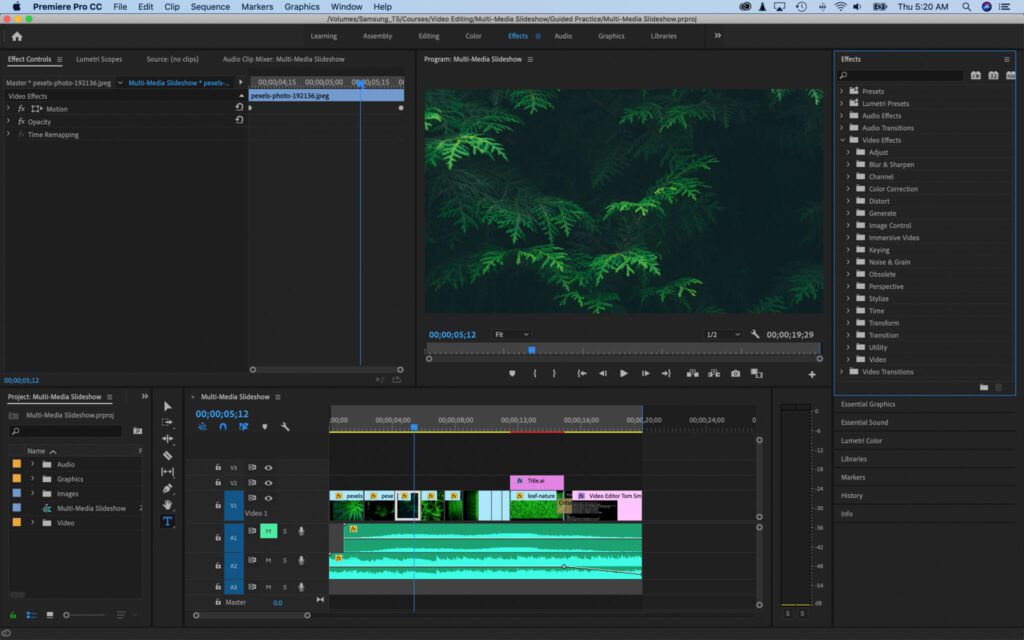
Effects Workspace
This workspace is similar to the Editing Workspace, but it provides easy access to the Effects Panel and Effects Control Panel.
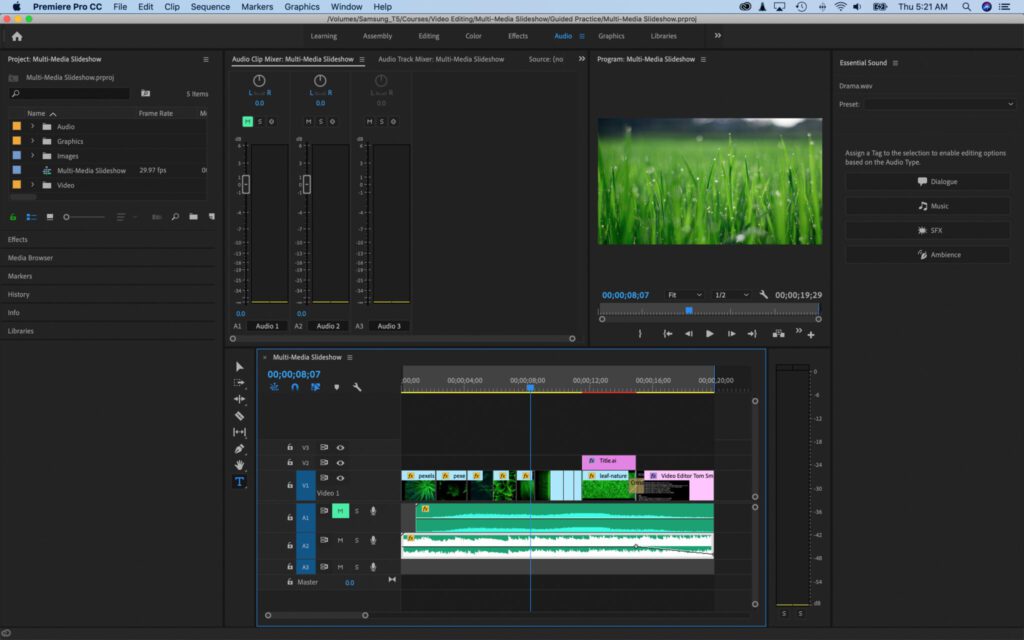
Audio Workspace
This workspace provides easy access to audio-editing tools.
Using the Premiere Pro Interface
The above video demonstrates how the different workspaces in Premiere Pro are used and accessed.
File Structure & Organization
Before you begin working in Adobe Premiere Pro, it is essential to organize your files on your system. Much like Adobe InDesign, Premiere Pro links to the content you use in the program. Therefore, it is vital to keep track of the files and not move or rename them while you are working on your video project.
Organizing Files on your Hard Drive
Building a video project requires lots of different assets from video, audio, logos, and still images. Therefore, you need a clean file system on your local drive to keep the files organized and ready to import into the project. Below is how I structure my folders.
Project Name
- Audio
- Exports
- Graphics
- Images
- Video
Extend Your Learning
My approach to file management is a simplistic version of those used by other editors. If you’re going to be working as a professional video content creator, then you will be better served by a more in-depth system as outlined in these articles:
Premiere Pro Gal’s folder setup
http://www.premieregal.com/blog/2017/10/24/the-best-video-editing-file-folder-organization
No Film School’s Bus Theory
https://nofilmschool.com/2018/02/watch-how-organize-your-editing-projects-bus-theory
Creating a Premiere Pro Project
Video Overview
In this video, you will learn how to create a new Premiere Pro project and save it in the appropriate location. You will then create a bin in the project panel and import a series of images to work on later.
Your Turn
Take a few moments to familiarize yourself with the interface of Adobe Premiere Pro. Open the sample file provided at the beginning of the course and click through the different workspaces. Feel free to open the project files and move through the different panels. You can also re-arrange any of the panels and then reset the workspace to the saved layout.
It is time to start developing your own slideshow of 10 images. Use a Public Domain website to find a series of images to use for the show. They should have a theme of some form, whether its color or content, it is up to you. Once you have the images, complete the following steps:
- Build a folder system on your hard drive and save your images there
- Create a new project in Premiere Pro and import your assets into the project